April 21, 2010
Garam Masala Dahl
We love Indian food, but we’ve been hard-pressed during our years in the Park Slope, Boerum Hill, and Carroll Gardens areas of Brooklyn to find really choice Indian restaurants. There are some decent options, mind you, but, for the most part, we miss the easy-to-find excellent Indian of our Washington DC days of yore. So, giving a humble nod to home cooking, Indian-style, we’re posting our recipe for slow-cooked garam masala dahl, complete with homemade garam masala powder. Hunker down on one of these last few not quite so warm nights and give it a try.
What you need:
Recipe Base
• 1 Cup Dried Red or Yellow Lentils
• 1 Cup Water or Vegetable Broth
• 2 Cups Vegetable Broth
• 1 Medium Onion, diced
• 1 Tbsp EV Olive Oil
• 5 Cloves Garlic, minced
• 1/2 Tbsp Hickory Smoke Flavor (optional)
• 4 Large Finger Potatoes, diced (roughly 1 cup cut)
• 1 Long Hot Pepper (Serrano or the like), cut into 1/2″-long thin strips
• Juice from 1 Lime
• 2 Tbsp Vegan Margarine
• 2 Tbsp Garam Masala
For the Garam Masala
• 2 Tbsp Black Cumin
• 2 Tbsp Coriander Seeds
• 2 Tbsp Black Peppercorns
• 1 Tbsp Cardamom Seeds
• 1 4″-Stick Cinnamon
• 6 Whole Cloves
• 2 Dried Bay Leaves
• 1 Tsp Ground Nutmeg
First, the curry powder. It may mean a trip to your area specialty store or Indian foods store, but freshly-made curry is well worth the little bit of hunting and extra effort. Plus you can use the extra for all kinds of stuff afterwards (we especially like using a bit in salad vinaigrettes). Curry is one of those things that’s a mixture of spices rather than one spice, which originally came as a surprise to me. But that does mean that there are tons of different types of curry and even those specific types vary by regional and even familial recipe. This one—garam masala, which is Hindi for “hot mixture”—tends to be spicy and smokey. You can sub in conventional cumin for black cumin if you like, but the black cumin does have a slightly smokey sweet flavor that’s really great. Start off by getting your cardamom seeds out of the cardamom pods and then throw them along with the cumin seeds, peppercorns, cinnamon, bay leaves, and cloves into a skillet on high heat. Now roast everything for about 7 minutes, tossing it all continuously so that everything browns evenly. We like this on the darker side, but you’d not really want everything to get too black or dried out. Now transfer everything to a small dish and add your nutmeg. Let everything cool for at least a few minutes and then transfer to a spice grinder or coffee grinder, grinding everything to a fine powder. Pour into a sealable container like a small glass mason jar and set aside for the time being. In the end, you’ll only use 2 tablespoons of the powder…TOTALLY DON’T use all of the powder in this one recipe or you’ll be hating life, I’m guessing.
Now onto the base. So, you need to rinse your dried lentils two or three times, carefully making sure that you don’t have any stray rocks or non-lentil things in the mix there. Then, add about one cup of water or, for a more flavorful dish, vegetable broth. A quick non-sidebarred sidebar on broth—in the past couple years, we’ve gotten really, really into making our own vegetable broth. I know, it sounds like a lot of work, but really, it’s not and it’s one of those things that turns out a bazillion times better than the packaged store version. Lolo from VeganYumYum has a great article on the matter that takes you through how to make your own broth and explains some of the pros. And, to add to that, we’ve recently started bagging and freezing scraps from our vegetables—carrot ends, bottoms of celery, radish and beet greens, anything really—and then making broth by boiling those along with a little added garlic for an extended period of time, maybe a couple hours. And it’s really been turning out great.
But, back to the recipe, let your lentils soak in the broth or water ideally for an hour or two. You can even leave them soaking in the fridge all day if you prefer. Once they’re soaked and expanded (about twice their dried volume usually), dice up a medium-sized onion—preferably Vidalia or another sweet onion—into half-inch or so pieces. While you’re doing that, warm your olive oil in a large cast iron skillet over medium heat. Why cast iron? Well, honestly, we’re quite smitten with cast iron, really. I mean, with cast iron you avoid that nasty, potentially carcinogenic non-stick coating, you get a little extra iron in your diet (no, really), and, seeing as cast iron’s hella heavy, you can endeavor to develop Popeye arms. Who wouldn’t want Popeye arms? Anyway, cook those onions for about 5 minutes until they start to become translucent, and then throw in your garlic, stirring to avoid too much browning along the edges and cooking for another 5 minutes. Add the hickory smoke, stir, cover and reduce the heat to medium-low, cooking for another 7 minutes.
While this is going on, in a small skillet, cook your vegan margarine on low heat until it’s melted. Once it has, use a spoon to carefully get all the liquid out and into a small dish, leaving the particular matter behind at the bottom of the pan. This simulates ghee, the clarified butter that seems ever-present in some Indian food. If you’re avoiding super-processed foods or oils, you can totally skip the margarine completely or maybe substitute it with some more olive oil.
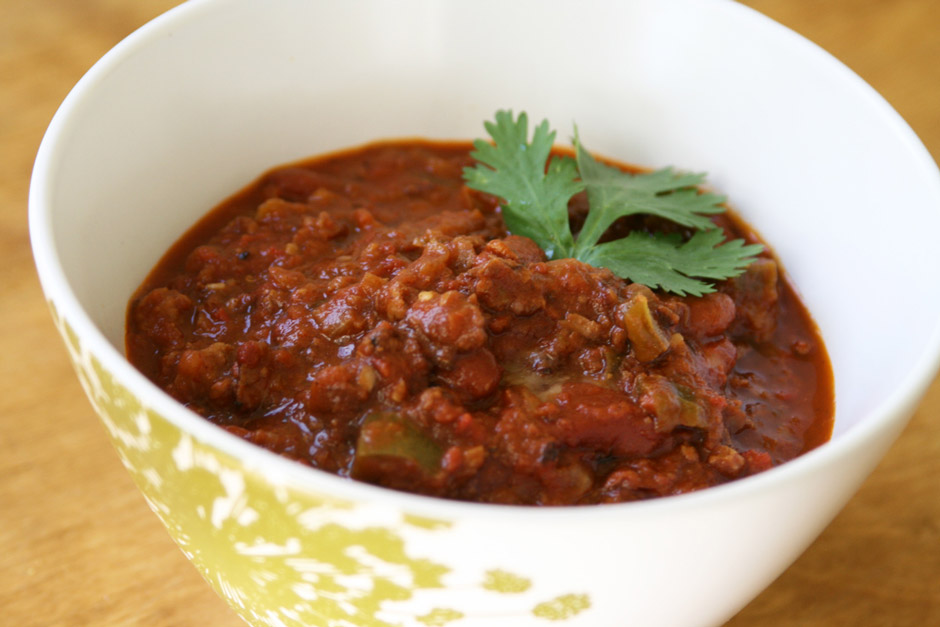
Now add your soaked lentils to the large skillet and begin to cook off the excess liquid with the skillet uncovered. Once that starts to dry out and thicken up a little, add your 2 cups of vegetable broth and cook on medium-low for 10 minutes covered, stirring occasionally and making sure the heat is at a point that doesn’t boil the mixture over or cause it to stick to the bottom of the skillet. Now add your potatoes, diced to 1-inch or so chunks, and cook covered for 20-30 minutes until the lentils begin to break up and the mixture thickens, stirring and scraping the pan bottom every 3 or 4 minutes. Now add your pepper strips, your 2 tablespoons of garam masala powder, lime juice, and your vegan ghee, stirring to mix and then cook uncovered and stirring for another 10 minutes or so, keeping your eye on everything so it doesn’t become too thick. Once it seems to have arrived at a desirable viscosity, serve over some lovely basmati rice or, for the carbophobic, alone. Oh, but be sure to give it a little leaf hat. Dahl loves leaf hats. So vain.