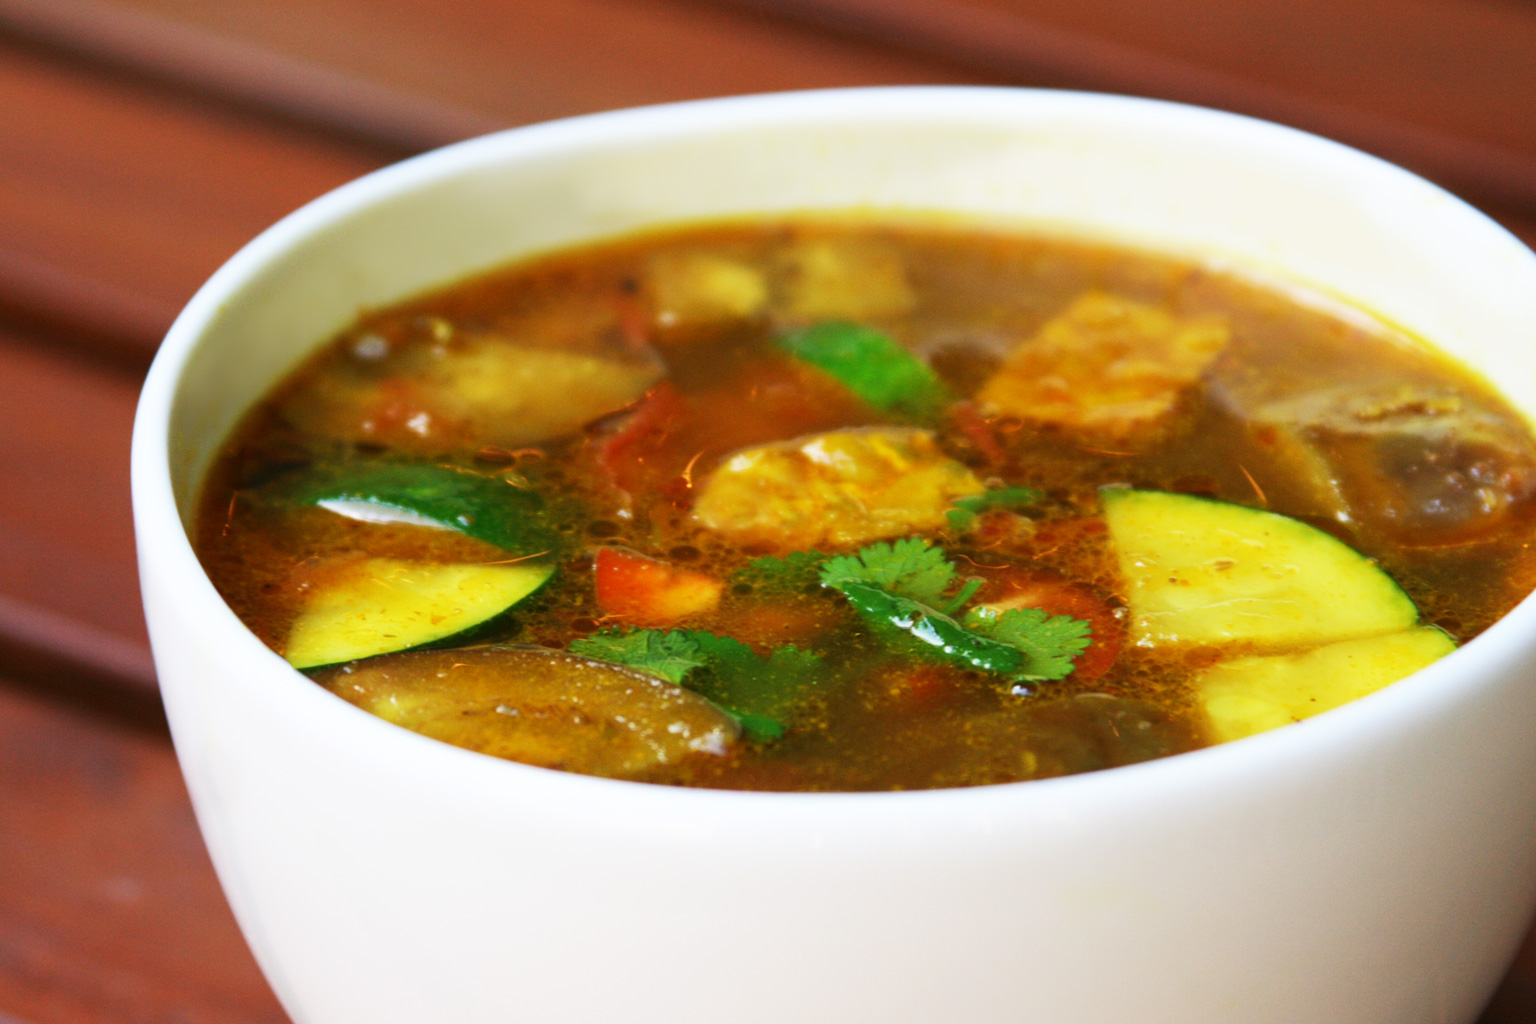
As is often the case with many of our favorite dishes, we can thank war + colonialism for Japanese curry, or karē raisu.

If you’ve ever had Japanese curry, you may have noticed it’s very similar to an Indian curry. And that’s certainly where its origins lie for this curry—a cross-cultural catch-all term for a spice-rich dish with a thick sauce or gravy derived from a Portuguese mispronunciation of the word for ‘spices’ that, like the dish, was adopted and made widespread by the British. Specifically, the British Navy, who made curries a staple of many ships’ meals in mess halls, though the British version was a bit of a bastardization of the Indian curry, adding meat + butter, thickening with wheat flour, and working from a tin of spice mix.

Seeking to address the proliferation of beriberi, a fatal vitamin deficiency that was sweeping Japan in the 19th century and a huge risk for those serving in the military, the Japanese Navy looked to their British counterparts, hoping the thiamine in the meat + wheat of these adapted curries would remedy the deadly situation. The dish quickly became a popular one amongst service members and, even after its post-WWII dissolution, the navy’s spiritual descendant, the Japan Maritime Self-Defense Force, continued the tradition, taking the culinary fascination even further with curry Fridays to help sailors mark the passage of time at sea. Individual JMSDF ships even customized their recipes making each mess hall’s curry unique (and some, according to this Atlas Obscura article by Anne Ewbank, skewed to the bizarre with their ingredients—”the curry served on the Hachijo patrol ship, for example, includes ketchup, coffee, and two kinds of cheese”).

Two kinds of cheese aside, the taste for curry followed sailors home after their service was over and eventually curries entered the culinary mainstream of Japan, being served at school cafeterias, restaurants, and making its way onto home dinner tables primarily through those boxed curry mixes that still proliferate today at specialty markets + grocery stores.

But when looking to make an authentic Japanese curry at home, we wanted to avoid the box mixes, most of which are extremely sodium-rich and prominently feature amongst their ingredients orangutan- and environmentally unfriendly palm oil.

So we took to the internet to research, finding that 9.75/10 of the recipes online also simply used box mixes for the dish. One though, by Daniel Gritzer, specified a handmade curry spice mix, so we decided to work from that recipe, veganizing, adding kabocha (because, yay, kabocha), and swapping a canned vegan duck that we like as the protein.

We’re writing the result up on these pages, partly so we can easily find it in the future, partly for anyone who might want to give it a try some time.

For the curry spice mix:
2 tablespoons (7g) whole coriander seed, toasted in a dry skillet until fragrant
1 tablespoon (6g) whole cumin seed, toasted in a dry skillet until fragrant
1 tablespoon (6g) whole fenugreek seed, toasted in a dry skillet until fragrant
2 1/2 teaspoons (6g) cardamom seeds, removed from pods + toasted in a dry skillet until fragrant
2 teaspoons (5g) whole black peppercorns, toasted in a dry skillet until fragrant
1/2 teaspoon (2g) fennel seed, toasted in a dry skillet until fragrant
1 (2-inch) piece cinnamon (3g)
3 cloves
1/2 of a star anise pod
1 or 2 strips (1g) dehydrated lemon or orange peel (optional)
2 tablespoons (16g) ground turmeric
1/4 to 1/2 teaspoon (1 to 2g) chili powder, depending on the intensity of your chili powder and how spicy you want the curry
Pinch grated fresh nutmeg

For the stew:
1 10 oz. can mock duck (available at asian supermarkets) or preferred vegan protein, cut into 1-inch chunks
Kosher salt and freshly ground black pepper
2 tablespoons (30ml) sesame oil, plus more as needed
1 kabocha squash, split, seeded, and cut into large, 2-inch chunks (see notes below)
1 large yellow onion (1 pound; 450g), diced
8 ounces carrots (225g; about 3 medium), cut into 1/2-inch pieces
1 quart (950ml) homemade vegetable broth or store-bought low-sodium
1 quart (950ml) homemade vegan dashi
8 ounces (225g) Yukon Gold potatoes, cut into 1-inch chunks
Half of 1 (6-ounce) apple, peeled, cored, and finely grated, minced, or puréed
1/2 cup vegan butter (4 ounces; 110g; we like Miyoko’s)
1/2 cup all-purpose flour (2 ounces; 55g)
1 (2-inch) piece fresh ginger, finely grated
3 tablespoons (25g) curry spice blend
Warm short-grain rice, for serving
Pickled ginger, for serving (see note below)
Scallion, diced + coated with seas salt or rakkyo (pickled Japanese scallion), for serving (see note below)

I know—it seems like a lot. But know that the spice mixture yields a ton, so you can make it much more easily down the road, and same with the dashi, which is technically optional but kind of the thing that makes this curry more Japanese than British or Indian. And, in a pinch, you can boil dried shiitakes + a sheet or two of nori if you don’t have kombu.

One pre-recipe note: If you’d like to homemade pickled ginger as a topper, it’s super-easy to do a quick, mild one—just thinly slice some fresh ginger or green/young ginger (which is in-season right now at farmers markets) and submerge in a small bowl with rice vinegar (or white vinegar if you want a more aggressive acidity). If you’re using young ginger, you can also slice up some of the green leaves thinly and do the same. And for the scallion, all you need to do is slice it up into tiny pieces, scatter across a shallow dish, and salt heavily before you start cooking—by the time your done, you’ll have a nice, bright (tasting) topper for the curry that’ll contrast the rich curry nicely (rinse the salt if you like; leave if you don’t mind and want a brighter taste).

For the spice blend, use a spice grinder (or coffee bean grinder if you don’t have one) and combine coriander, cumin, fenugreek, cardamom, black peppercorns, fennel, cinnamon, cloves, star anise, and orange/lemon peel (if using) and grind to a fine powder. Empty into a small bowl and combine with turmeric, chili powder, and nutmeg, then set aside.

For the stew, brown the chunks of mock duck in a tablespoon or so of oil in a heavy skillet, really crisping up some sides but leaving the majority supple. If you can’t find the duck or don’t want to use it, just use a good sub. for chunked beef, basically (we get it; canned meat, but it really is good). Transfer to a plate or bowl and set aside.

As with most winter squashes, the kabocha can bee a bit of a pain to get prepped. We’ve found that it’s best to (carefully) slice the top stem area off with a big knife, then (carefully) slice down the middle and split open. Then use a spoon or scooper (or grapefruit spoons work great) to scoop out the seeds and squash guts. You can totally set the seeds aside and roast with a little soy sauce for a snack later if you like. Then we tend not to cut the rind off of kabocha—it’s absorbed into the meat of the squash as it cooks—but you can if you like. Either way, then carefully slice the kabocha halves into long 1 inch thick wide segments, then square off chunks and set aside.

Warm a big, heavy stock pot (we use a cast iron Dutch oven) on medium flame, then add a tablespoon of oil to the pot once it’s warmed; wait a half minute or so for the oil to warm, then carefully add your kabocha chunks, stir, and cover tightly. Assuming your lid’s tight, you shouldn’t need to add any water or stock to cook the squash, but you may need to if it’s not. Regardless, cook until tender to a fork poke—usually 30 or so minutes. Once done, empty the squash pieces into a bowl and—without cleaning out the pot—add your other tablespoon of oil and then your chopped onion pieces, stirring uncovered until they begin to caramelize and become fragrant + translucent (about 10 or 15 minutes).

Now add your carrot + potatoes and cook covered until tender (another 15 or so). Your cooked kabocha can now make a return to the stock pot, along with your grated or puréed apple, broth, dashi, and protein. Simmer on medium-low covered while you prep the curry roux—in a medium saucepan, melt your butter (which replaces the rich-yet-terrible palm oil in this recipe) on low heat. Once melted, add your flour, continually stirring and raising the heat to medium, cooking until you’ve got a thick roux or gravy that begins to brown a bit. Now stir in your spice mix + grated ginger and cook for another minute before carefully scraping the whole thing into the main stock pot or Dutch oven.

Simmer for a bit covered to allow all the taste to mingle, then uncover, stir, and taste a cooled spoonful, adding salt and/or pepper to taste and then cooking until thickened nicely. Once done, serve over warmed rice and top with ginger slices + scallion/pickles and serve.

Itadakimasu!

Meatballs come in myriad sizes and styles, being significant staples in many a culture’s cuisine. But when most of us in the States think of meatballs, we go straight to the prototypical example of Italian spaghetti + meatballs, which, I think it’s fair to say, is commonly and easily vegan-ized, as it were.

The giant meatball + spaghetti, however, not so much.

When we heard that Beyond Meat had created Beyond Beef—a soy-free, gluten-free vegan ground beef with 20 grams of protein per serving and pea protein as its base—our minds went straight to polpettone (Italian for large meatballs, as opposed to the regular polpette). For anyone already familiar with the Beyond Burger, the Beef is basically a more neutral version of that that’s bought in a block, allowing for more versatility in cooking + recipes.

We gave a recipe a try and it turned out great paired with a good quality spaghetti and Katie’s father’s family marinara recipe (their last name’s Frichtel, but the family’s very much Italian-American), so we thought we’d share it here.

Here’s what you need for the meatball(s):
• 1 lb/package Beyond Beef
• 1 medium yellow onion, finely chopped
• 1 tsp salt
• 1 tsp freshly ground pepper
• 1 Follow Your Heart Vegan Egg (betting a flax egg would work too)
• 1/2 cup breadcrumbs (we used rye, for extra flavor)
• olive oil for sautéing

For the Frichtel Marinara:
• 1 large yellow onion, peeled + finely chopped
• 4 large carrots, left un-peeled + finely chopped
• 3 celery stalks with leaves, all finely chopped
• 9 cloves of garlic, smashed, peeled + finely chopped
• 1 large green bell pepper, cored + finely chopped
• 28 oz. can crushed tomatoes (we like fire-roasted)
• 2 6 oz. cans of tomato paste
• 2 tsp. of crushed pepper
• large handful of fresh Italian basil, finely sliced (or 2 tbsp. dried Basil)
• small handful of fresh parsley, finely sliced (or 1 tbsp. dried parsley)
• a few leaves of fresh sage, finely sliced (.5 tbsp. dried sage)
• 1.5 tbsp. dried oregano (or equivalent fresh if you’ve got it)
• .5 tbsp. dried thyme (or equivalent fresh if you’ve got it)
• pinch of ground cinnamon
• pinch of ground or shaved nutmeg
• 3 bay leaves
• good quality olive oil
• salt, to taste
• red wine (optional, I guess)

For garnish, we used some sliced fresh basil and thinly sliced Violife Just Like Parmesan (it’s essentially a block of flavored potato starch, so not much nutritional value, but the taste is pretty accurate and it slices and grates really well).

For the pasta, we wanted that classic spaghetti, so we went with a nice Italian one we found at our local grocery store which just listed semolina as the only ingredient. If you want to make fresh pasta, though, it’s really not hard and super-good (also super-impressive if you’re looking to wow someone)—we wrote up a recipe for fresh vegan pasta a few years back. But if you’re going with packaged, you’ve most likely made pasta before; if not…that’s super-exciting! Good luck! Follow the package instructions either way, but that’s pretty much your last step; let’s rewind:

First, the sauce.

The aforementioned Frichtel marinara is a cherished staple in our house and marinara day, when you need fresh sauce for a meal or you’re replenishing your frozen supply, is a lovely, fragrant, homey day we always enjoy. Yes, you can totally use store-bought sauce, and, yes, I’m sure there a lot of great ones out there these days, but I’m betting this one’s better, so give it a go.

The recipe itself isn’t complicated or tough, it’s just time-consuming. Actively, your time up front is a ton of chopping—again, not difficult, just a bit arduous. Then it’s a lot of waiting around, occasional stirring, and doing whatever you want while you allow flavors to combine and liquid to reduce off.

Basically, though, once you’re done with all that dicing and finely chopping, add all of your vegetables to a large pot with 2 tablespoons or so of warmed olive oil, tossing to coat. Then throw in your crushed pepper and about a half-teaspoon of salt and simmer covered for about five minutes. Now add your crushed tomatoes and your tomato paste. Fill the tomato paste cans with water or broth, adding a total of 6 of those cans worth of liquid to the pot (we like broth—more flavor; interested in making your own, more nutritious + less sodium-heavy broth— give this a look). Whatever liquid you add to the cans, the idea is both giving more room for boiling off in the spot and getting every little bit of that concentrated, flavorful paste out of the can, so scrape, shake covered, whatever it takes. Then bring the heat up to medium, add all of the spices + herbs, and stir. If you want, here’s where you’d add a cup or half-cup of red wine to mix at this point, to give the sauce more depth of flavor (pretty sure the alcohol would cook off with this much heat and time, for anyone concerned). Cook everything covered on medium-low to low heat, avoiding too much bubbling as it thickens. Stir and check the taste after an hour, at which point you can add more spices or herbs as needed. Cook for another three or so hours covered, stirring from time to time to make sure the bottom’s not sticking too much. Store whatever you don’t use frozen.

Now the meatball(s). Pre-heat your oven to 350°F. Then, essentially, put all your meatball the ingredients in a big bowl, mix with a spoon or fork. Then, once it’s well mixed, get your hands in there and really integrate things into a cohesive mass that should want to stick together pretty well—too crumbly, add some liquid; too runny, get some more breadcrumbs in there. Once it feels good and stable, form your meatballs. For us, this made four, very large meatballs, but you do you—maybe you want some smaller ones; maybe you want one gigantic one, Regarding Henry style (anyone?). Coat an already warm skillet with olive oil, allow that to warm, and add meatballs, not crowding too much and allowing room to turn each to brown all sides (does a ball have sides?). Once thoroughly browned, set the meatballs on a baking tray or dish and place uncovered in the oven for 30 or so minutes too cook through (if you’re going the single monster meatball route, likely a little longer…but also, whatever—this isn’t dead animal, so sanitarily, you’re good, you just don’t want a cold-middle meatball, ammiright).

Now cook your pasta, plate, and Mangia! Mangia!

We just got turned on to a fun new food happening here in LA (like, literally this morning)—Zoë Food Party, which is pretty much what it sounds like.

The Zoë in question is Zoë Komarin, Jersey native, artist, and former chef at Tel Aviv’s Cafe Xoho who now, with her husband Udi, happily calls Los Angeles home, where she orchestrates food parties with spontaneity and craveability at their core.

We caught her at her weekly Wednesday morning pop-up in the back yard of Highland Park’s Collage Coffee (who, by the way, makes THE ((full stop)). BEST ((full stop)). Almond milk lattes in town ((regular full stop because grammar, I guess? But at this point…)).)

Granted, this was our first encounter, but from what we can gather, these weekly hump day pop-ups center around egg or vegan turmeric-chia-chickpea patty breakfast sammies with nearly everything—the puffy freshly steamed pita bread, the vegan patties, the tehina, the variant toppers—made from scratch by Zoë. And it’s all awesome and packed with popping flavor.

Our sandwiches featured the aforementioned savory vegan patties (seen frying on the spot below) and a broccoli salad in Zoë’s super-soft, super-fresh pita bread with her homemade sesame tahina sauce and topped with marinated pine nuts, a sweet tomato jam, fresh herbs, and edible flowers foraged by hand.

But the bread and butter (hah) of Zoë’s business model are these food parties, gatherings in homes, parks, or anywhere centered around Zoë’s cooking—as she puts it “I am your witchy food wizard entertainment clown bouncy castle.”

So clearly there’s a lot more to experience.

Explore Zoë’s site if you either want to find out more about these food parties or you want to see what is now our favorite site of the week. Or both.

“‘I could never be vegan, I love cheese too much’ said every vegan before going vegan.”

True, it’s a cliché + tired meme at this point, but one that rings true for us here. Cheese—or more accurately, our love of it—was something that stood in the way of us moving from vegetarian to a totally animal-free, cruelty-free lifestyle for years. And this was in the 90s, mind you, when your vegan cheese alternatives numbered in the ones, roughly (props to you, Tofutti Slices, you bright orange, rubbery, maybe-only-edible-in-the-most-technical-of-senses things, you).

Now it’s 2019 and we’ve come a long way, baby, both in the store-bought realm and in the home-cooking one. A recipe that ties the two together well in our minds is one we’ve been pulling out of our party bag of tricks a lot lately—vegan quest, a creamy, rich, cheesy dip that highlights the bold flavors of roasted chilis + tomatoes and has roots in thew Southwest; most notably, Austin, Texas. At a glance, it might seem like an intimidating recipe, but once you get the cashew cream base down, the rest of the recipe comes together pretty easily and quickly.

Here’s what you need:

Homemade Cashew Cream (from roughly 1.5 cups of soaked raw cashew pieces; see below for instructions and additional ingredients)
7 oz. Follow Your Heart American Style Slices
4 tbsp. Miyoko’s Cultured Vegan Butter (our local Trader Joe’s carries this at about half the price of most other places somehow FYI)
4 Large Fresh Anaheim/New Mexico Green Chilis
3 Serrano Peppers
1 Jalapeño Pepper
3 Roma or Large Other Ripe Tomatoes

4 Large Cloves of Garlic
(uncut, unpeeled)
Juice from 1/2 Lemon
Sea Salt (to taste)
A Few Dashes of Your Favorite Hot Sauce
Water (to thin when necessary)
Garnishes: your favorite store-bought or homemade salsa, chopped cilantro leaves, sliced jalapeño

As mentioned, the base of this our everyday homemade cashew cream—something that’s really pretty easy to make if you’ve got a decent blender and something that’s a super-versatile kitchen staple for us. The cream’s appeared on these pages a few times before, and we walk through the basics of how to make it with our recipe for fresh pasta, but, basically, it’s a matter of soaking a cup or two of raw cashews in water overnight and blending until excessively smooth with olive oil, a touch of sesame oil, a heaping helping of nutritional yeast, a couple cloves of raw garlic, a drop or two of hickory smoke extract, a dash of sea salt, maybe a peeled, chopped shallot, and, ideally, some homemade brine and pickled cauliflower stem or something along those lines to give it some funk. That last bit is the ‘secret ingredient’ that really pulls the cream over the top in terms of taste. We simply salt a plate full of cut cauliflower stems and let them stand for anywhere from a few hours to overnight at room temperature. But this cashew cream ‘recipe’ is all about experimentation and evolution—it’s a little different for us every time and we tend to enjoy not having any hard + fast rules for portions so we can let the process and product grow and change over time or to meet particular cooking needs. Like a very rich taste? Add more olive oil. Like more of a sharp taste? More salt and maybe a little vinegar. Smoke? Add more…well, smoke (you can find liquid smoke in most grocery stores these days, usually near the barbecue sauce—look for the ones that are just water and smoke extract ideally). The end product should be something that’s really rich and creamy and very much crave-able.

Usually with our standard staple cashew cream, we try to keep it as thick as possible so we can use it in a wide range of ways, keeping it thick for a vegan crème fraîche; thinning it out a bit for something more cheese-sauce-like. In this case, since we’re cooking it with other ingredients afterwards, it doesn’t really matter how thick the cream is, so we added some water to the blending process, which makes it easier and quicker to get that smooth texture you’re looking for. The other difference here is that we added a little apple cider vinegar to give it a sharper kick and a fresh carrot cut into pieces to give it a richer color and a little more substance.

Once you have your cashew cream at a good place, pre-heat your broiler for a couple minutes and the place the peppers, tomatoes, and unpeeled garlic cloves on an un-oiled baking pan; then place the pan under your broiler, leaving it there for about five minutes, until the vegetables’ skins are blackened on one side. Take it out and flip everything over carefully with some tongs or super-calloused hands. In most cases, you can take the garlic out at this point as it’ll be pretty cooked through. Broil everything else flipped for another five minutes or so and then remove from heat. In our case, we actually used pretty firm, large, on-the-vine tomatoes, which took longer than the peppers, so we removed the peppers when they looked done and cooked the tomatoes longer on their own. You basically want to get both to a point where their skin is pretty black and pulling away from the flesh. Then let them sit until they’re cool to the touch and melt your vegan butter over low heat in a Dutch oven or other large, heavy pot. Once everything’s cool, peel the tomatoes, discard the skins, roughly chop and add to the pot once the butter’s fully melted. Same for the peppers, but you’ll also want to remove the seeds, which can be done easily by slicing long-ways and running under cold water (that’ll help any stubborn skins to come off too). The garlic is likely pretty liquified at this point, so you can probably just squeeze the insides into the pan and discard the papery skins.

Stir everything together and let it sauté for a few minutes on low heat, then carefully add what should be about 45-50 ounces of homemade cashew cream (about 3/4 of a blender container’s worth). Stir to mix everything together and then take your store-bought sliced vegan cheese and chop into small cubes. We specifically call out Follow Your Heart in the ingredients above because we like their company and products, but you can use anything similar, even blocks instead of sliced, sliced is just usually more available. The basic idea is you want to add some pre-made vegan cheese that’ll give the finished product a little more stretchiness and add to the nice, sharp flavor. Whatever you choose, add the chopped up cubes to the mixture along with squeezed lemon juice and stir to incorporate and allow it to start melting the cheese down.

Cover with a heavy lid and cook on low until the store-bought cheese is melted, uncovering and stirring to make sure everything’s incorporating together well and the bottom’s not beginning to burn. With the thickness and texture of this queso, you’ll most likely be able to keep it on low the whole times you’re cooking it. If it seems too cool to melt the added cheese though, turn your heat up appropriately, just keep an eye on it and make sure it doesn’t start bubbling too much. If the queso starts to get too thick or the bottom’s starting to burn despite stirring and scraping, just add some water gradually to thin it back out; once the cheese is melted, you can just cook off the water to get it to your desired, thick and creamy consistency. Then salt and add any desired hot sauce to taste. If there’s not enough of a cheesy taste for you, try adding some more nutritional yeast and/or more store-bought cheese. Once you dip a chip in and like what you taste, you’re done.

Yeehaw! Enjoy, pardner!

Growing up with a German grandmother who spent her youth and much of her adulthood in Deutschland, there were a few mainstay old world traditions that she made sure to integrate into my and my brother’s upbringing; the most memorable being her yearly holiday cookies—buttery crescents that she made shortly after Thanksgiving and then aged in cookie tins until Christmas. The ones that survived my grandfather’s diligent search-and-devour regimen in the intervening weeks—combatted by an equally diligent hand-swatting-and-scolding regimen by Mutti (German for mom—a moniker passed down to us by our dad)—were a childhood delicacy and something we looked forward to every year.

I’ve talked about these cookies for years, but never actually followed through and found a recipe that seemed right. Maybe it was the fact that we were having a child of our own and I subconsciously wanted to instill a similar fond memory and tradition in our son’s mind, but last year I finally buckled down and did it, reaching out to friends via socials to see if my description of the cookies rang a bell for anyone.

One of the hurdles in the past to finding an accurate recipe was the fact that everyone in my family called these butterhorns growing up. But if you look up German butterhorns, the recipes are way off—most use eggs and yeast, which I have no recollection of, and they’re flattened and rolled into layered crescent shapes, looking nothing like what I remember. But through the crowdsourcing magic of Facebook, I narrowed in on two recipes that seemed right—one an old Peace Corps friend found from the Ottawa-based food blog Plated Cravings for Vanillekipferl (vanilla crescents) and another from a friend’s old spiral-bound Emmanuel Lutheran cookbook (scanned + pictured below) for Kippfvln (Frisian or West Germanic for ’tilt’ or ‘crescent’). They’re also commonly called Mandelkipferl (almond crescent) or Mandelsichel (almond sickle), which makes a little more sense in our minds since the raw almond is really what gives these cookies their distinct, craveable flavor. We’ve read that the common crescent or sickle shape in European holiday baking is to pay homage to the citizens of Vienna who repelled soldiers from the Ottoman Empire (Turkey) when they played siege to the city in 1529AD.

I made both recipes and we ended up being a house somewhat divided on which was better—Katie preferred the Vanillekipferl from the Canadian blog (slightly more uniform in texture and consistency, maybe a little more vanilla-y); I preferred the Kippfvln (more almond-y and less uniform with the larger pieces of chopped nuts coating the cookies). But only slightly on both counts—they turned out pretty similarly and both are wonderful and very much in-line with what I remember.

Neither recipe mentions letting the cookies stand for weeks, so I’m not sure if that element’s something my grandmother added herself or it was maybe a larger geographical derivation in her part of Germany. Though I think the aging is less about fermentation (though Mutti did make a mean, embarrassingly stinky sauerkraut) and more about giving the very dry, crumbly dough time to absorb the moisture and sweetness of the powdered sugar that coats them. Or maybe it’s a trick of the mind—make these things once a year and tell everyone they have to wait three weeks to eat them and they’ll think they’re the best things in the world.

Regardless, they’re the best things in the world. And pretty easy to make. As with many simple recipes, the key is quality ingredients—key among them here, the butter. I urge you not to use your standard vegan supermarket butter or margarine. California-based vegan creamery Miyoko’s makes a vegan butter that’s worlds apart from the others in the field and will make all the difference in a butter-heavy recipe like this. And they’re much more available these days, in both health food stores/Whole Foods and in mainstream supermarkets in many cities. You can also order it directly from the company online. Other than that, we highly recommend using a good flour (we’re longtime King Arthur Flour fans, and they’re a B Corp, which is awesome).

The only other alteration I made was using the vanilla sugar from Plated Cravings‘ Vanillekipferl recipe in the recipe that appears above too, because why would you not? The stuff’s stellar.

Und Fröhliche Feiertage!

It might seem odd or overly precious to fixate on a corn chip, but there’s something to be said for the perfection of the simplest of things in our diets, especially those things that hold up other foods (literally in this case). And for anyone who hasn’t had Chicas chips, take it on good authority that they’re really, really good.

Doing some light research online, we couldn’t find out a ton about the company beyond your standard About web page, but were intrigued by some of the messaging on the packaging and what exactly makes them so very good. So we reached out to the Southern California company that makes the chips, Arboleda Foods, to find out more. We ending up talking with their head of marketing + design and daughter of company owners, Sarah Chaidez (below, first row, far left), about the origins of the family-run business, what it means to be an immigrant-run business that bills itself as ‘proudly American’ in the current socio-political environment, and why we can’t stop eating these chips. Seriously. Can’t stop.

raven + crow: So, first thing’s first—we love your chips and salsa. We’re honestly pretty obsessed with the chips especially at this point. I think we’re mainly interested in finding out a little more about the history of the company and how it came to be—can you tell us a little about how it all started?

Sarah Chaidez: We started in 2010 selling a homemade salsa at several So-Cal Farmers Markets. The recipe originated from the owner Irlanda Montes’ mother. The salsa was so good that it needed good chips to sample it with. Fortunately for us, none of the chips Irlanda found in markets got of her approval so she decided to make her own. To her surprise, people started requesting the chips and she started getting up at 5am to make a few batches before heading to the farmer’s markets. The chips started to become so popular that she soon had to rent a small commercial kitchen to be able to produce them.

That’s awesome. Like I said, we LOVE the chips, so it makes sense. Cool to see such a direct supply-and-demand relationship though. Was food culture a really big part of Irlanda’s upbringing?

Yes, she was born in Ecuador. During her upbringing she saw her father and mother go to the open air market every day to buy fresh ingredients for their daily meals. When she came to the United States, she continued the tradition of having fresh cooked meals daily. Good homemade food was always on the menu and it always brought the family together.

That’s something that I feel like has only recently again become more common in our post-war culture and upbringings here in the States even though it’s so deeply rooted in so many other cultures. The salsa really is great too, but what do you think it is about the chips that make people love them so much?

The salsa that we have right now is a new recipe originating from the original. The original recipe had to be refrigerated and we needed a shelf-stable salsa to be able to place it along the chips. On the other hand, we have kept the original recipe for our chips from the beginning. What makes them great is not only the recipe, but the process of how they are made. Chicas™ recipe is not a common chip recipe. Therefore, the process of making them and frying them is different than what you see out there. Also, we added the uniqueness of rice bran oil which makes the chips lighter, fresher, and healthier.

What goes into making the chips, in terms of ingredient sourcing and then actually producing them?

We make sure that our ingredients come from very reliable companies. They work hand-in-hand with our needs and the needs of our customers. We believe it is not just the ingredients that make the chip, but the time and labor it takes to make them. The process itself is similar to most other chips, but we proudly can say that we put lots of love and care into their production. The biggest difference is that some of the processes is done by hand to keep the unique flavor and texture of our chip.

Why do you all use rice bran oil? Is that a family tradition or something more born from recipe testing?

We did very extensive research about all types of different oils. We found out about rice bran oil having lots of health benefits and having a high smoke point. This made it a perfect match for our chip. Even though this oil is more complicated to get and more expensive, we definitely wanted to add some good-for-you ingredients into our chips.

Yeah, we had no idea we loved rice bran oil so much. Who knew? Can you tell us about the name, Chicas—‘girls’ in Spanish—is that a reflection in the people that run the company?

When we had just started the company, Irlanda’s sisters came along to help. They spent endless hours in the commercial kitchen frying. This was new to them since they all worked in office environments before, but this became a time of bonding and laughter. Traditionally in South America, instead of calling each other by name, they would all call each other ‘Chica’, which means girl in Spanish. With Irlanda and her three sisters in the kitchen, you can imagine this word was used a lot. At that time the chips were called Arboleda Chips, named after the company. Eventually Irlanda’s sisters moved on to do other things, but Irlanda never forgot those times she spent with her sisters. Later on we wanted a simpler and catchier name. So, in honor of her sisters, Irlanda named them Chicas Chips.

I know you’ve said that the company started out and remains very much a family endeavor—can you tell us a little more about that?

When the company first started in 2010, Ray and Irlanda invited various family members to help including her mom, brothers, sisters, a sister-in-law, nieces, nephews, son and daughters. Time passed where many came and went, but to this day it is still a family business. Ray and Irlanda, as husband and wife (above, first row, middle), are heads of the business, and their two daughters—myself and my sister, Nastassia (above, first row, far right)—handle marketing, accounting, and purchasing.

Very cool. You all are based out of Harbor City, right? Is most everyone at the company Los Angeles natives?

Pretty much! Irlanda came from Ecuador at the age of thirteen and Ray came from El Salvador at the age of six. Even though Irlanda kept a lot more of her Latin traditions, they both have embraced American cultures. Nastassia and I were born in the US and raised as LA natives. Our other employees are a mixed of Los Angeles natives and other immigrants from other Latin countries, like Mexico, Peru and Honduras.

On your chip bags, you have a graphic going across the top that reads ‘PROUDLY AMERICAN’—why was that important to put front-and-center for you all?

Ray and Irlanda are entrepreneurs. They have started different businesses in the past before becoming successful with Chicas™, and they are beyond thankful that America has given them the opportunity to do so. Where Chicas™ is now would not have been possible without all the opportunities that are given to us here in the states. We are proud to be here and proud to be able to give back by creating new jobs.

Do you feel like that sentiment has taken a different tone or is seen in a new light in what a lot of us see as a political and social climate that’s soundly anti-immigrant?

The political situation that is going on right now does not take away from the beauty this country represents. Throughout history there have been seasons of good and bad. There is a lot of negativity in our country today, but our focus is on the good of our country and the kindness of many Americans. We will continue doing our part to do the right thing and will continue to embrace our Proudly American representation.

Beautifully put. For the most part, has the experience of starting and running a business in Los Angeles been a good one? I mean, as a fellow small business owner, I know it’s tough, but seems like you all are doing really well.

Irlanda and Ray have had many ups-and-downs, especially since they started their business right after a very bad economic period. They are truly fighters, and the company has persevered even though many times they felt like giving it all up. The company is stable and growing now, but tough would be an understatement. It definitely takes everything you’ve got. We truly are fortunate to have a really good product that has kept our hopes high, and seeing the response we get from our customers gives us an eagerness to strive forward. We trust in God that soon we will be able to say that we are doing really well.

Likewise. We’ll do our part by buying as many chips as we can eat. Which is a lot, trust me. I have a kind of nerdy product packaging question—I know back in the day you did more of the traditional tie-closed bags for the chips, but now you have what I honestly have to say are the nicest chip bags; they open really easily and look really nice and non-crinkly after being opened. How did you manage that or who makes those for you, if you don’t mind me asking?

The reason we started with twisty-tie closed bags is because being a small company that was just starting, we only had the equipment and knowledge to seal them this way. To our surprise, people loved it! They felt like they were getting chips out of a home kitchen. The reason we upgraded is because as we grew we needed something more secure for shipping and food safety. The bags were now in store warehouses, exposed to cross contamination, or too easy to break open. At this point we needed to think of our customers and provide them with the same chip quality but better packaging. Ray, Irlanda, and I come from a graphic artist background, therefore we knew that presentation was essential, so we are proud of our creation in and out. In regards to the material, it has been a long journey to get the best film for our chips, making sure it is American-made. The company that makes our bags as well as our cardboard boxes are local family-owned business as we are.

Oh, cool—I had no idea the bags were American-made too. That’s great. Any future plans for expansion—either in terms of products beyond salsa and chips or into other markets—on the horizon?

We are striving for continued growth. We are working to get into new markets, expand our online store, and also expand into the food service industry. For now, we are just in the Southern California area, but soon we will be in some Northern California markets. With regards to other products, we are always fiddling with new recipes and products. But, as you can see, we have to be extremely happy with a product to be willing to put our effort into it. More than anything we want to provide our customers with lots of satisfaction that will keep them coming back for more.

Well we’re hooked.

If you’re interested in trying Chicas chips + salsa, check their locations page on their site for stores that carry them. Or just come to our house. We likely have a fresh bag.

All photos with the exception of the feature one courtesy of Arboleda Foods.

Let’s start out like this—we have no beef (hah) with jackfruit. It’s great.

When properly prepared, it’s a superb replacement for things like pulled pork when looking to eschew the animal from your diet but wanting that texture—the fact that it doesn’t have much taste by itself is a boon as, when rinsed and drained well, brined jackfruit soaks up most any flavor you pair with it. We’ve even lauded the tree-born tropical fruit (the largest in the world) on these very pages as far back as 2012; twice that year, actually (big year for jackfruit).

But that’s part of the problem—we’ve been eating jackfruit for a long time and we’re honestly a little sick of it; it doesn’t have much nutritional content, it comes canned in brine, which means a lot of sodium even after heavy rinsing, and if you do want to deal with a fresh jackfruit, you’re in for a daylong affair and a lot of hard work (and reportedly a possible kitchen remodel (hire houston kitchen remodeling services from here)—they evidently often ooze latex-like sticky white goop when cut up).

But the other morning we were visiting the local mushroom vendor at our excellent neighborhood farmers market and noticed a sign next to the kind oyster mushrooms touting their versatility in animal meat replacement, specifically calling out that the fungi make for a great vegan pulled pork. And after some experimenting with recipes, we have to wholeheartedly agree—a single (roughly $6) giant mushroom stem hand-peels into excellent pork-like shreds and holds up much better than a lot of its mushroom friends, giving a nice, meaty texture, even after cooking for hours. Best yet, the inherent umami taste of the fresh mushroom plays well with savory, smokey flavors, giving you superb sandwich fixings and taco fillings with a pretty easy prep. And giving us native southerners a cruelty-free and much healthier way to enjoy some childhood classics.

Here’s what you need:
1 medium yellow onion, peeled and sliced thinly
6 cloves garlic, smashed, peeled, and cut into chunks
2 cups vegetable broth (we make our own, which sounds like a heavy lift, but once you’re in the habit, really isn’t and is highly recommended; if you’re not up for it though, go with low-sodium store-bought)
1 tablespoon packed dark brown sugar
1 tablespoon smoked paprika
1 tablespoon kosher salt, plus more as needed
1/2 teaspoon freshly ground cumin
1/4 teaspoon freshly grated cinnamon
1 large fresh king oyster mushroom stem, hand-peeled into long shreds
1 cup barbecue sauce (optional; homemade or store-bought)
olive oil

So, this is really easy. First off, we hear tell this works great in a slow cooker, but we don’t have one, so we do everything in a large, heavily lidded cast iron Dutch oven on medium-low heat in the oven (around 200°F) for four to six hours.

First, shred the mushroom—after washing, pat dry and then, by hand, start pinching ends and pulling up strands, peeling them back and off into shreds, kinda like those old mozzarella-like cheese sticks adults used to (maybe still do?) stick in kids’ lunches. Set aside in a dish and coat the shreds with a mix of the paprika, sugar, salt,cumin, and cinnamon. Now heat about two tablespoons of oil in the Dutch oven stove stop over high heat and the sliced onion and chucked up garlic in a fairly even layer; allow the onions and garlic to come to simmer and then top them with the mushroom, carefully following that up by pouring in your broth. Add the lid and bring to a boil (you’ll see steam forcing it’s way out); turn off the stovetop heat and place the Dutch oven in the non-Dutch, regular oven. Keep at around 200°F and cook until the mixture’s mostly absorbed by the mushroom, leaving it a little saucy and checking regularly to make sure it hasn’t dried out altogether (if it has, just add some water and cook a little longer).

That’s it. Now find some nice, soft hamburger buns or fresh tortillas and get to enjoying, animal-free.

Two items of produce are at the peak of their growing season locally right now.

Okay, that’s not true—this is Southern California in April; like, a million things are at peak season right now. But for the purposes of this piece, we’re focusing on two of the one million—snap peas and green garlic.

Both vegetables have been at our favorite farmers’ market stands for the past month or so, but they’re each hitting their respective sweet spots just now. The former, snap peas (AKA sugar snap peas), usually have a pretty long growing season, but they’ve been especially delectable of late, hitting the pinnacle of their distinct earthy sweetness.

Green garlic—which is essentially just young garlic that retains its leafy green tops—by comparison, has a relatively short season before it becomes…well, garlic. As with other early harvest crops (think baby arugula), the taste is less pungent or spicy than it would be in its more mature form; which, in the case of garlic, creates a great opportunity for using it raw. And what better use for raw garlic than homemade pesto.

Your traditional pesto—or pesto alla genovese—at its most basic, consists of garlic, pine nuts, fresh basil leaves, coarse salt, Parmesan, pecorino, and olive oil, all ideally of the highest quality given that, essentially, you’re just blending everything up and serving it as is, so ingredients drive the taste.

In the case of this seasonal dairy-free variant, we’re using the brighter, less aggressive green garlic, obviously, subbing in the earthy sweetness of the snap peas for the distinct anise-esque basil taste, keeping the coarse salt + olive oil, using a vegan Parmesan, and then using pistachios instead of pine nuts, which retain the rich, fatty nut flavor, but give the pesto a slightly more buttery taste and fewer piney notes. Plus it makes the pesto that much more green in color.

For the pasta, we’ve talked through this before on these pages (specifically, here), but we’re huge fans of making fresh, vegan pasta at home—despite what you may think, it’s really easy once you get the hang of it and so beyond amazing in taste. Plus it’s just three ingredients—white flour, vegan egg replacement, and a dash of salt. That’s it. In the page referenced above, we grind flax seed and use that as an egg replacer and binder, but it’s since got even easier with Follow Your Heart’s Vegan Egg. When we’re making pasta for two, we essentially just measure out a half cup of flour, make the equivalent of one egg (2 TBSP + 1/2 cup of cold water), add a dash of salt, mix well, and then add flour as needed until the dough forms a ball that’s not too sticky. That’s it. Then we let it rest for a half hour and roll it out, adding more flour if it sticks to the rolling pin and keeping in mind that the more we roll it or knead the dough ball, the more the gluten activates and creates a nice, well-bound pasta dough. Then we cut as we like and boil til it floats. Again, the more you do it, the easier it gets and the more it’s second nature. And The Kitchen has a good post that walks you through the particulars too if you need more details. But you can also totally use any store-bought pasta with this recipe.

For the pesto though, here’s what you need:

Serves two, with a decent amount left over most likely
green garlic, one stalk
snap peas, 2 cups
in-shell pistachios, 1 cup (or equivalent shelled)
grated vegan Parmesan, 6 tbsp (we like Follow Your Heart’s or this nice homemade one from Minimalist Baker)
coarse sea salt, 2 dashes
extra virgin olive oil, 3 tbsp

First, trim the tips of the green leaves of the garlic and discard anything brown/tan or overly leathery and dry—you only want to use the supple green parts of the leaves and then the inside of the forming bulb, none of its bitter, fibrous matter; cut into 1″ pieces or so and set aside. Next, shell the pistachios, removing as much of the papery brown skins inside as you can without going crazy and using only the green meat. Now throw both ingredients into a decent blender along with your salt and vegan Parmesan and pulse until you have a nice, consistently coarse powder.

Now, trim the tips from the snap peas and cut into 1″ chunks. If you want to get really into it, you can also remove the stringy membranes from the peas too, but it’s not totally necessary as you’ll be blending this too in exactly one second. Throw those into the blender (see?) along with the olive oil and blend well, until you have a nice, well-mixed but still somewhat coarse pesto sauce. If you’re using it right away, great, do it; if not, refrigerate immediately so you keep as much of the fresh green look as you can.

To finish, we like to top with a few basil leaves and throw a little bit of Follow Your Heart’s other Parmesan on top, but, again, totally not necessary. What is necessary—fresh ingredients; so get to your local farmers market and give this a try (NYC/East Coast friends—give it a couple monthds, maybe).

Last week, British food writer, journalist, and chef Nigel Slater posted to his socials a rather enticing photo of a butternut tart he made with smoked bacon, parsley, and Parmesan.

We’ve been fans of Slater since his 2009 cookbook, Tender: A Cook and his Vegetable Patch. It was one of the first cookbooks we’d ever owned that merged well those world of the personal memoir and the more traditional, recipe-driven instruction and featured truly stunning photography—both commonplace enough in the world of cookbooks now, but new for us in the aughts. We love vegan cookbooks and vegan cookbook authors, but, having been vegans for about two decades now, both of us tend to find more value and excitement in working from non-vegan cookbooks that are vegetable-centric, and Tender remains to this day, so many years later, one of our favorites.

Back to the tart, though, Slater posted it to promote a piece for The Guardian where he waxes poetic on the virtues and challenges of the butternut squash—“The marshmallow note of squashes, and particularly the butternut, needs taming with something savoury. …Such flavours balance rather than bully, calming the butternut’s one-note sugar hit.”—and shares two of his favorite butternut recipes, the tart being one of them. Seeing the recipe, full of milk, heavy cream, butter, cheese, and bacon, we saw a challenge in making a vegan version, but, with some of the cruelty-free products and dairy-/egg-replacements on the market these days, we thought we were up for it. The result was a rich, savory dish that we’re guessing will become a regular staple for us in these few colder Southern California months.

Recipe below, all derived from Slater’s original, which provided measurements in grams, largely, so there’s a little rough conversion there too (150 grams of flour is actually more like . If you haven’t yet tried Miyoko’s Vegan Cultured Butter (rich, coconut based, and made here in California) or  Follow Your Heart’s new Vegan Egg, they’re both game-changers in the kitchen and highly recommended if you’ve been yearning for a new butter and/or egg replacement. Replacing the heavy cream Slater calls for, we’re using a homemade cashew cream, which is a constant staple for us. We talk through basics on how to make it with a previous recipe for fresh pasta, but, basically, it’s a matter of soaking a cup or two of raw cashews in water overnight and blending excessively with olive oil, a little sesame oil, nutritional yeast, raw garlic, and, ideally, some homemade brine and pickled cauliflower stem or something to give it some funk like that—you can simply salt and let stand some stem for a few hours and it’ll do; and just experiment—blend the ingredients, add things gradually, and taste-test as you make it. Then, for the bacon, we were torn between using something like Sweet Earth’s Benevolent Bacon and the shiitakes, but ended up wanting to go a little less processed, more whole foods. But, for the record, I’m sure a nice vegan bacon like that would work really well (and if you go that route, nix the aminos/soy, smoke, paprika, and sesame oil below). We don’t list it in the ingredients, but we had some fresh basil on-hand that we tore up and used to top once the tart was cooling—nice, but definitely not necessary.

We used a run-of-the-mill 6″ pie tin. Nigel claims this serves 6-8…. we ate half of it on our own in a single sitting, so I guess we’re just rounding out that over-eating American cliché?

For the pastry:
Miyoko’s Vegan Cultured Butter (or another dairy-free butter….but this one’s really good) 6 tbsp
plain flour 1.2 cups (we like King Arthur brand—they’re a founding B Corp AND make great products)
Follow Your Heart Vegan Egg 2 (instructions come with the product, but it’s basically 2 tbsp of the powder + .5 cups of cold water, whisked)
Follow Your Heart Grated Parmesan 4 tbsp
totally un-branded water 3-4 tbsp

For the filling:
small butternut squash (roughly 1 lb)
sliced fresh shiitake mushrooms 1 cup
Bragg’s Liquid Aminos or low-sodium soy sauce .5 cup
liquid smoke (usually found near the barbecue sauce in the grocery store) 1 tbsp
smoked paprika 1 tbsp
sesame oil 1 tbsp
olive oil 1 tbsp
Follow Your Heart Vegan Egg 2
cashew cream 1 cup
unsweetened nut milk .25 cup
fresh parsley chopped, a small handful

To finish:
Follow Your Heart Parmesan 2 tbsp

Start with the pastry—cut the butter into small dice-size pieces and rub into the flour with your fingertips until it has the texture of soft, fresh breadcrumbs. Alternatively, reduce to fine crumbs in a food processor. Here, the original calls specifically for egg yolks, but, from our reading on the subject, the reason for that is usually to provide more moisture to things like dough—FYH’s Vegan Egg mentions on their instructions that recipes calling for eggs and water often don’t need as much water, and we found that just using two equivalent vegan eggs, as called for above, worked totally fine. Anyone who follows through the links above will notice too that we’re siting two different vegan Parmesans that Follow Your Heart makes. Though each of those products have different tastes, ingredients, and textures, we’re guessing you could use one of the other, we just happened to have both on-hand. If you use each like we did, just use the grated one in the dough and the more shredded one to finish. Add the vegan eggs, the grated parmesan and the water, a tablespoon at a time, stopping when you have a firm, even textured dough. Pre-heat the oven to 390F°.

Next, slice your shiitake into small, thin strips and marinate in the mixture of aminos/soy, smoke, paprika, and sesame oil. Turn the mushrooms over to coat evenly, gently squeeze, turn again, and let sit for a half hour or so to fully marinate. Drain and then fry the mushrooms in the oil in a shallow pan until crisp. Remove from heat. (Again, skip this step if you’re using a pre-made vegan bacon.)

Peel the butternut, halve lengthways, discard stringy fibers and seeds, and then cut the meat into short wedges. Place the pieces of squash in a steamer basket and cook over boiling water for 8-10 minutes until relenting—soft but not falling-apart-soft.

Make the filling—beat the vegan eggs, cashew cream, and nut milk, season tot taste with salt, if needed, then add the chopped parsley. Place the dough in the pie tin and gently push in out to the tin’s edges and up it’s side, making certain you have pushed the dough deep into the corners and that there are no tears or cracks. You may need to add a little flour as you go if the dough thins out too much or is too sticky—that’s fine. Chill for 20 minutes in the fridge. Bake for 20-30 minutes in the pre-heated oven, until the pastry is golden, browning a bit at the edges, and dry to the touch.

Lower the heat to 350°F, place the pieces of butternut in the pastry shell, and then scatter over the crisped shiitake/vegan bacon. Pour in the filling and dust the surface with the grated parmesan. Bake for 25 minutes until the filling is just set. Remove from the oven and, as Slater says, “leave to cool until just warm (when tarts such as this are at their most delicious).” Cut, serve, enjoy.

Around this time last year, we received an invitation to a friend’s pickling party. We fully realize there are many on the vinegar-averse side of the pickle spectrum in the world, but we both fall heavily on whatever the opposite end of that spectrum might be—vinegar-obsessed; brine-dependant; pickledicted? Whatever you’d like to call, we dig pickles of many and most kinds, across many and most culinary spheres. (If you’ve never had any of the varieties of the very intense and craveable Indian pickle, we’d highly recommend giving them a try.)

So needless to say, we were stoked to be invited to a pickle party (not to be confused with a sausage fest).

Actually, this wasn’t just any pickle party, this was, as our friend and fellow pickle-enthusiest put it, “an afternoon of pickling and sitting around in the backyard being unproductive, colloquially referred to as the Just The Tip Pickle-a-thon.”

We’re very much a high-low culture kind of group.

What followed, though, was a lovely, relatively refined afternoon of laid-back pickling on a massive level, complimented by good company, cocktails, and a nice view of Los Angeles from our friend’s back yard in Altadena. We thought the whole thing worth both documentation and potential replication for anyone interested, especially as we near non-peak-produce season for much of the country.


Key to the success of the party was making the whole thing as easy to participate in as possible.

Pickling’s something that can seem intimidating to anyone who hasn’t done it before, especially for those only familiar with traditional canning and the arduous sterilization of jars involved. But, unless you’re a homesteader looking to feed yourself through a long, harsh winter, quick-pickling will likely get the job done for you and knock down some mental barriers that could keep you from delicious homemade pickles. (Instructions abound on the web, but Eating Well has a nice, un-daunting how-to that we like on the non-canning version of pickling.)

With the goal in-mind of making pickling easy, our friend and her roommates generously provided snacks, drinks, a wealth of sealable glass mason jars, and a huge stockpot full of brine. All they asked attendees to bring were “food items you’d like to preserve in a salty brine for all eternity” and any additional drinks or snacks anyone might like.

True, putting down for spices and mason jars is a bit of an investment, but it went a long way to easing the buy-in for us party-goers. Plus, in this case, they kept the brine very simple, multiplying this recipe from Epicurious (the above-linked quick-pickle instructions list good basic sweet brines and sour brines too), and mason jars are made to be bought in bulk at pretty reasonable prices, online and in most larger grocery stores. If the finances are still a barrier though, it’s easy enough to ask everyone to chip in a couple bucks for the whole thing.

At the end of a long, lazy day of catching up with friends and sharing a glass or two of pickle-friendly cocktails, we ended up with a nice array of pickled vegetables that we enjoyed both on their own as happy hour snacks and as complimentary toppers on meals in the months to come (I for one enjoy a sliced pickled radish on just about any Asian dish).

So next time you’re looking for an excuse to hang out with friends and running low on briney condiments, consider a pickling party.